How to Post a Job Opening on Beploi
1. Access the "Recruitment Area"
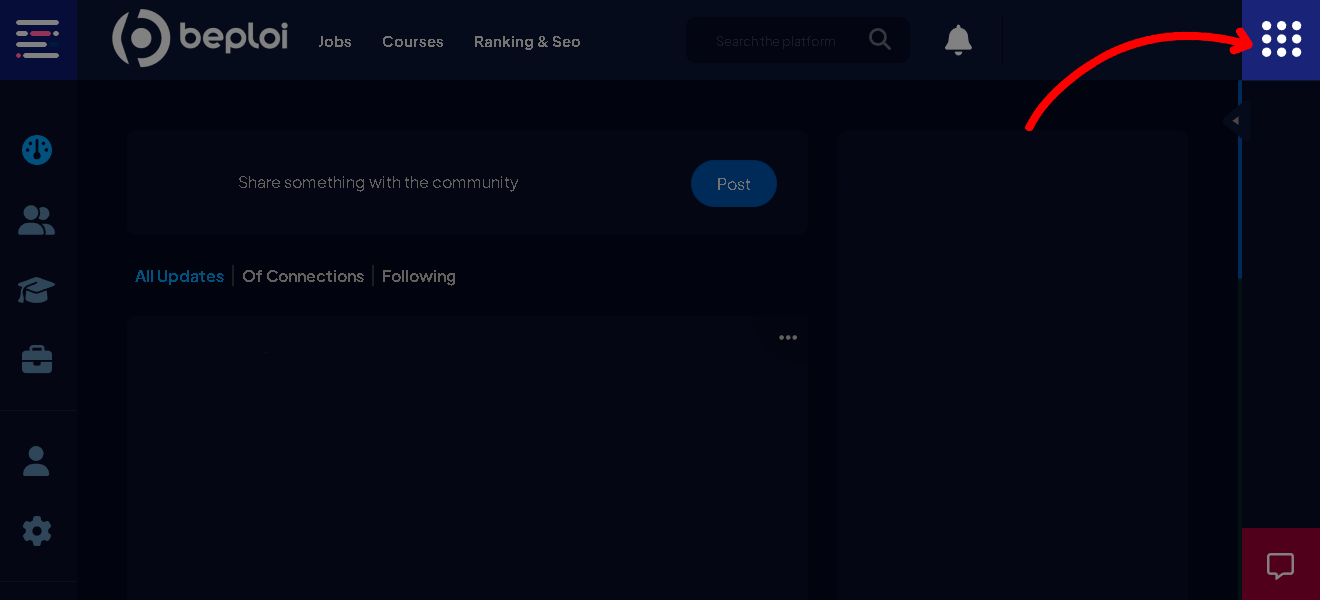
1. On the Beploi homepage, click the grid icon in the top-right corner.
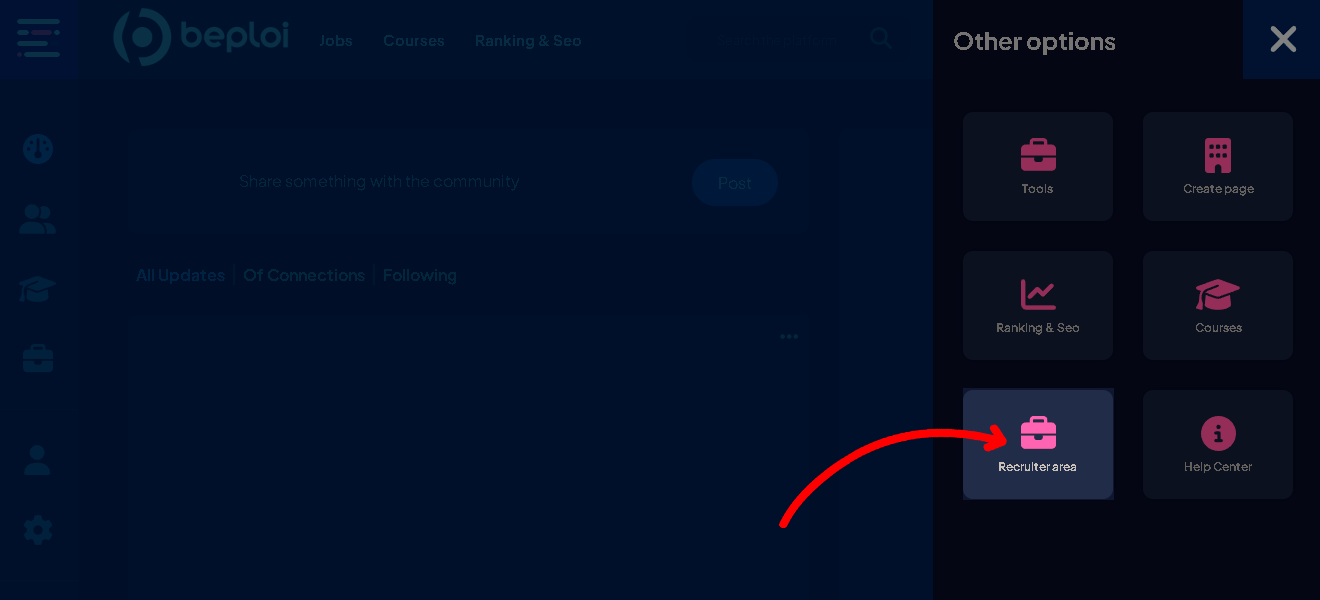
2. In the menu, select the "Recruiter Area" option.
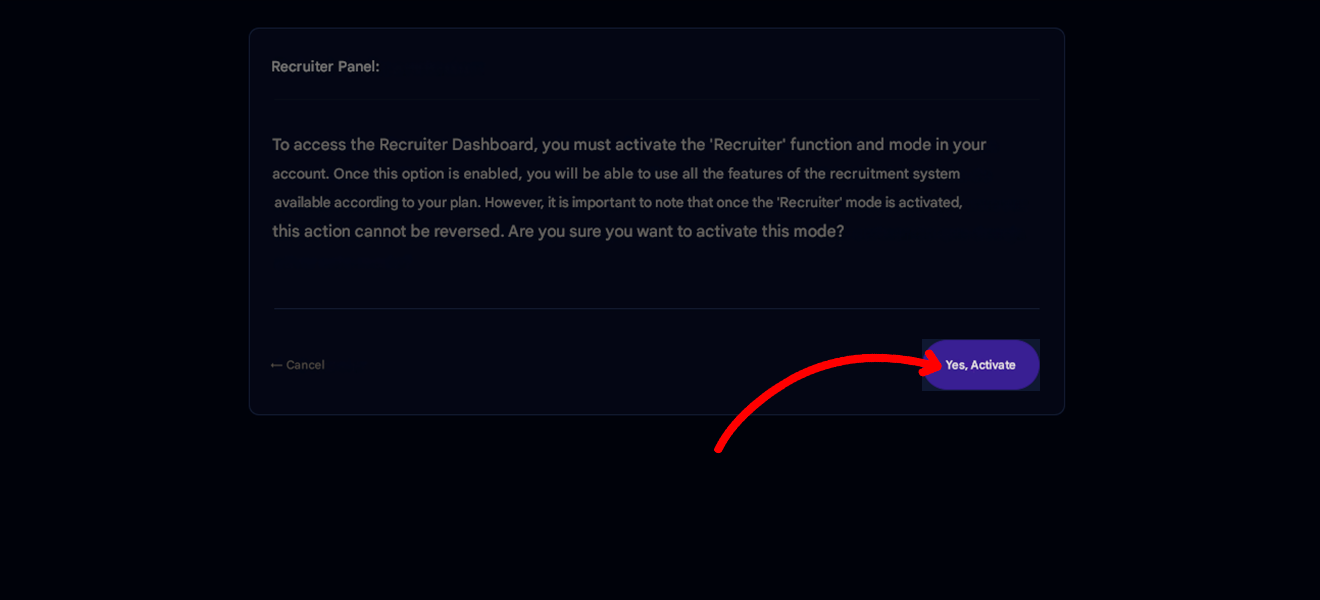
- Activate the "Recruiter" mode by clicking "Yes, Activate" in the bottom-right corner. This option will appear only the first time you access the area, if you don’t already have a recruiter account. Once activated, you’ll gain access to all functionalities.
2. Choose How to Post the Job
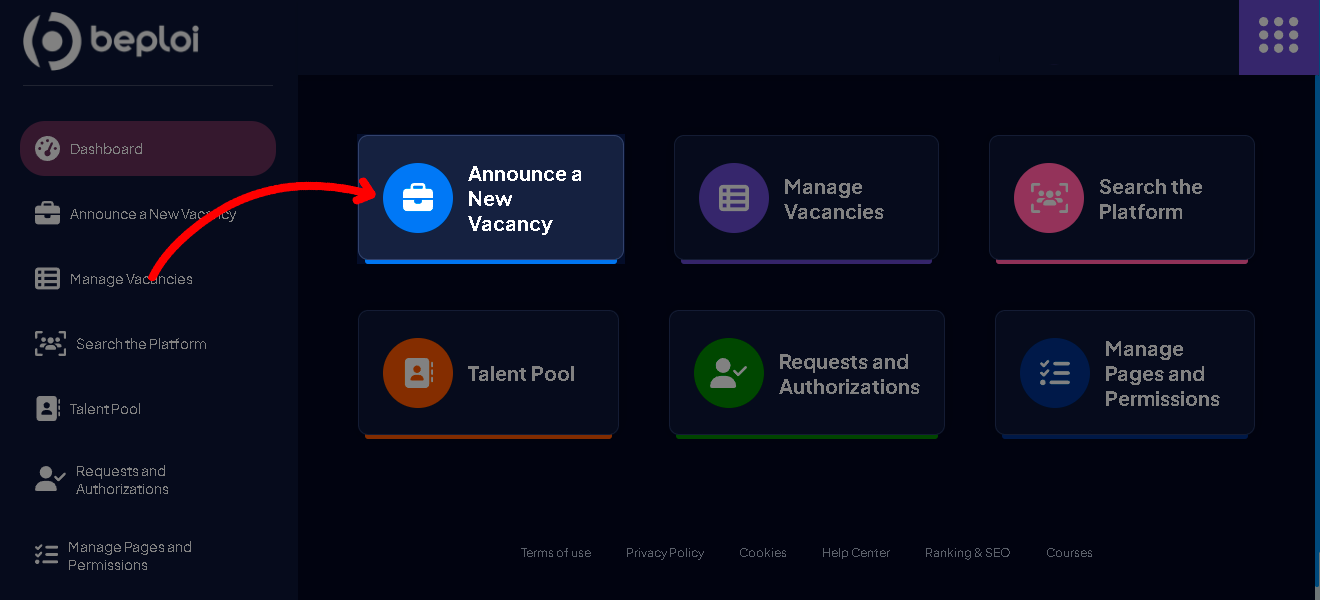
1. On the "Recruiter Area" dashboard, click "Announce a New Vacancy"
1. Choose how you want to publish the job:
- As a recruiter profile: Click on your profile picture to use your recruiter account.
- As a company page: Ideal for job posts on behalf of an organization. If you don’t have a company page, follow the next step to create one.
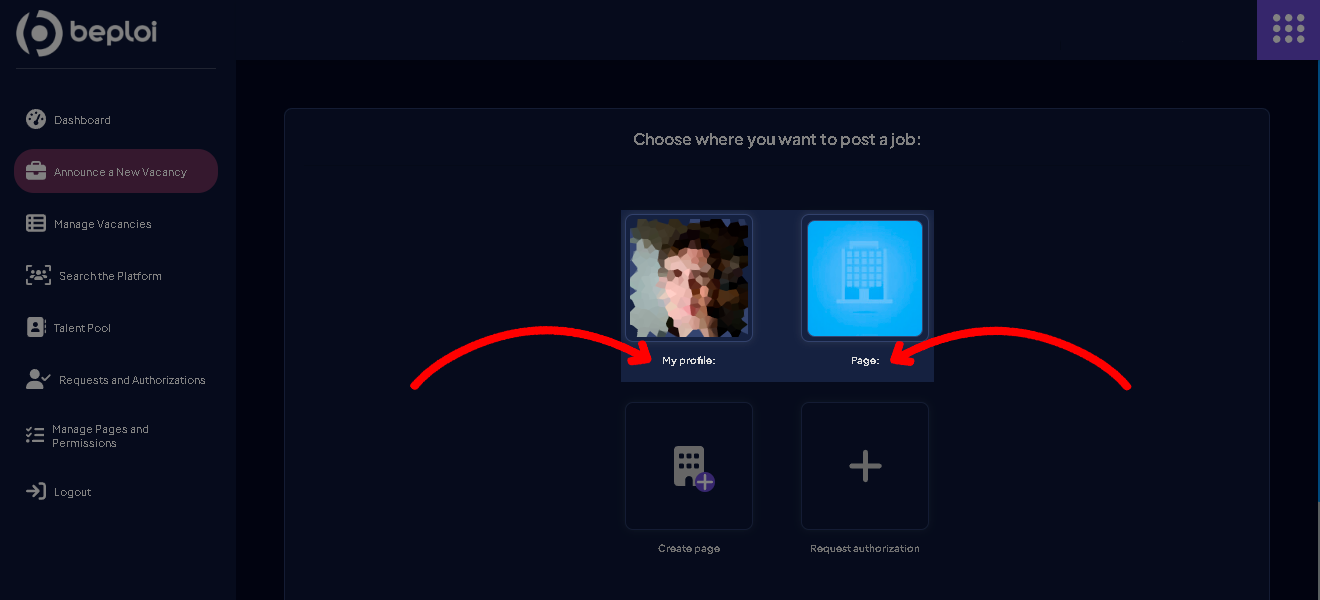
Note: If you want to publish or manage job posts on behalf of a company, you can request authorization if the company page is already registered on the platform. To do this, click "Request Authorization" and search for the company name.
3. Creating a Company Page
1. Click "Create Page" and fill in the required fields:
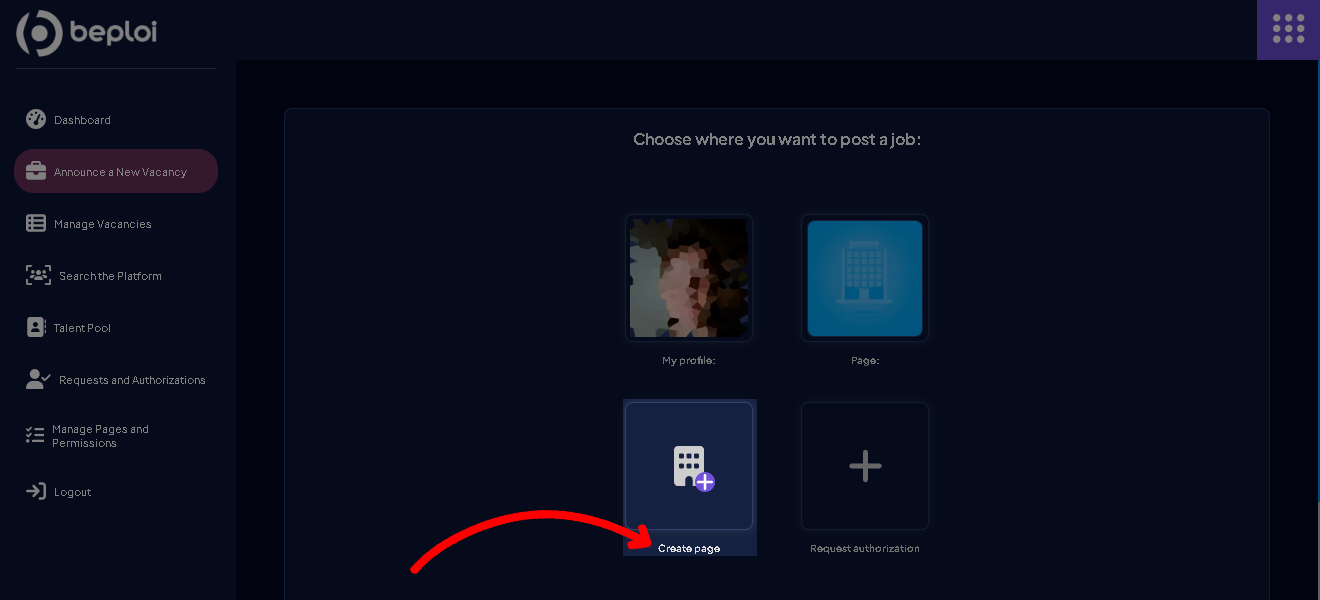
- "Page Type": Choose the company’s field of activity (e.g., Accounting, Construction).
- "Company Name": Enter the official name.
- "Username": This will appear in the page’s URL (e.g., beploi.com/@beploi).
- "Company Size": Indicate the number of employees.
- "Type of Company": Choose the type (e.g., Franchise, Corporation).
- "Website URL": Add the official website or a social media link (optional).
- "Company Description": Briefly introduce your organization.
2. Check the box confirming that you are the official representative.
3. Click "Create Page."
4. Customize the page with a profile picture and cover photo, if desired.
4. Posting a Job
1. Return to the "Recruitment Area" and click "Announce a New Vacancy."
2. Choose the created company page or your personal profile.
3. Fill in the job details:
- "Job Title": Example: Video Editor.
- "Work Type": On-site, hybrid, or remote.
- Location: Provide the city/state if applicable.
- "Job Description": Detail the responsibilities and qualifications.
- "Skills": List up to 20 relevant skills (e.g., design, video editing).
- "Related Positions": Add up to 10 to improve search results and notifications.
- "Experience Level": Choose between Internship, Junior, Mid-level, etc.
- "Work Mode": Indicate if it’s full-time, part-time, volunteer, etc.
3. Click "Save and proceed to the next step."
5. Setting Up the Selection Process
Setting up the selection process is optional but allows better control of the recruitment stages. Here’s how to configure it:
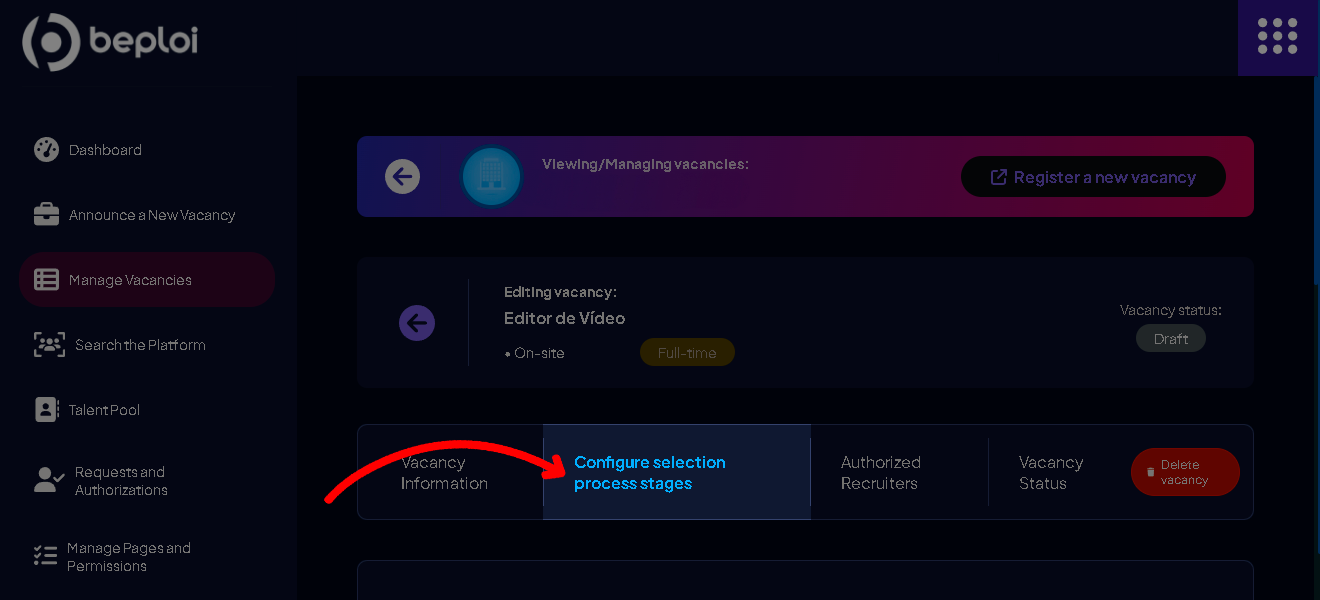
1. Mandatory stages (automatically set up):
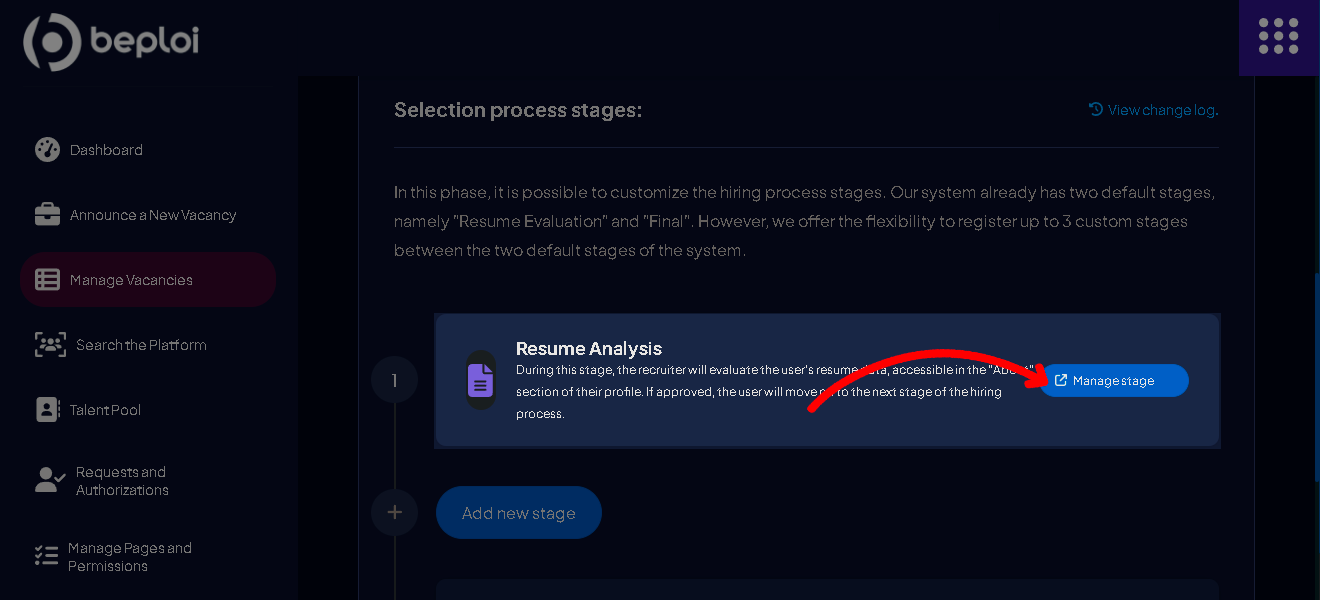
- Resume Analysis: This is the default first stage of the selection process.
- You can click "Manage Stage" to add questions for candidates to answer. However, this is optional and can be skipped.
- Final hiring process: This is the mandatory final stage. It usually involves the final contact with the candidate to finalize details.
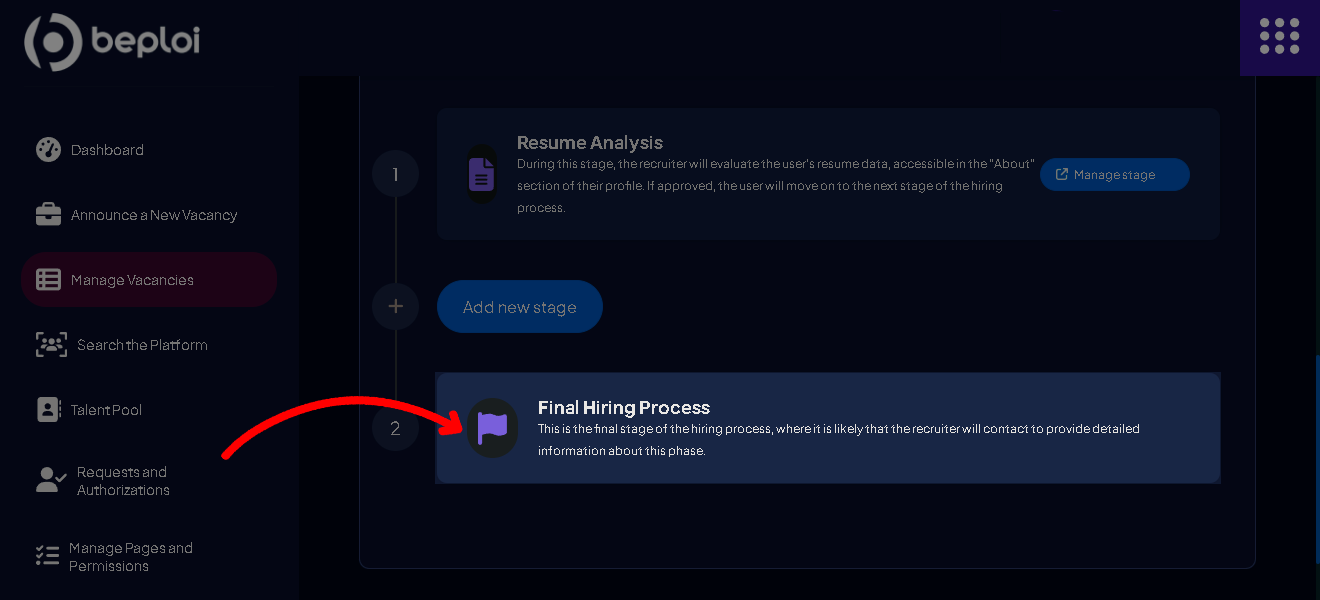
2. Intermediate stages (optional):
- You can add up to 3 additional stages, such as:
- Interviews;
- Technical or psychological assessments;
- Salary negotiations.
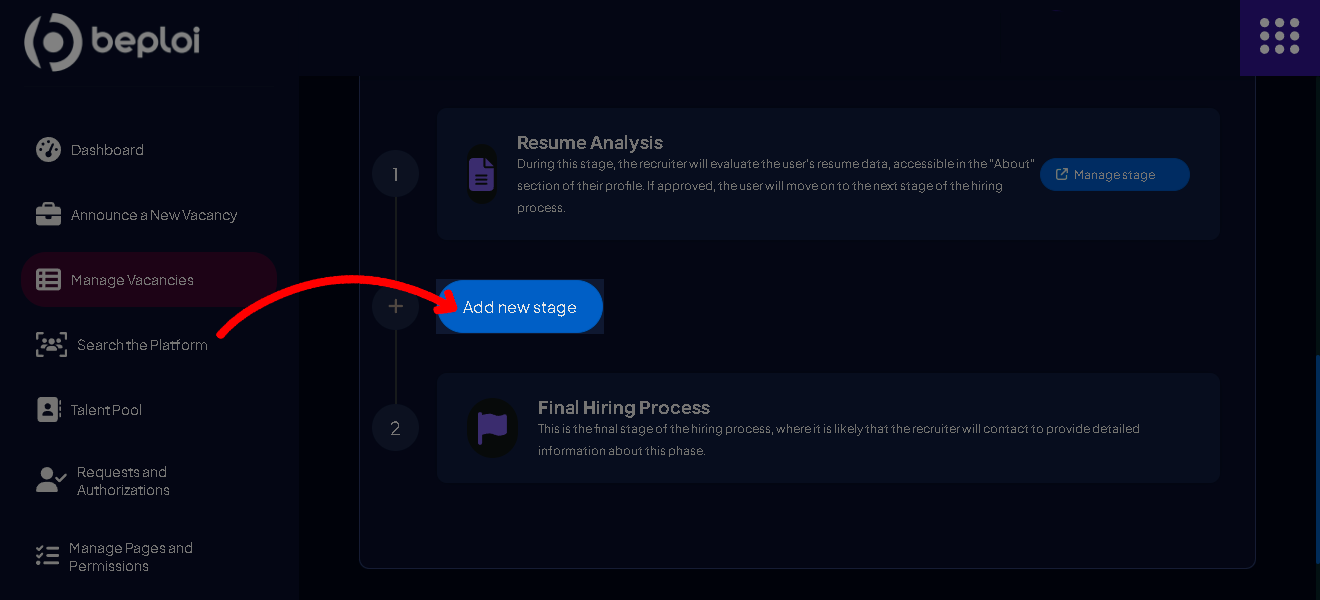
- To add a new stage:
- Click "Add New Stage."
- Provide the title, status, and description of the stage.
- Click "Save Changes."
3. Authorization for Additional Recruiters (optional):
- If your company has other team members involved in the recruitment process, you can grant them access. This feature is only available for job posts made through company pages; it’s not available for recruiter profiles.
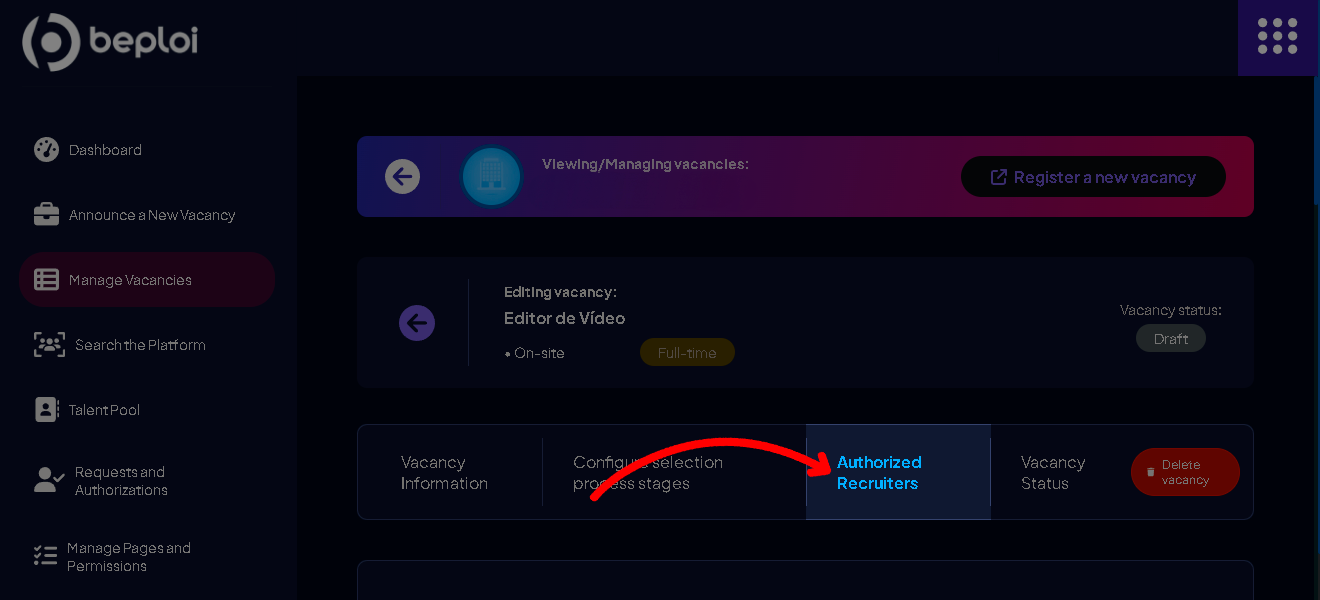
- Click "Authorized Recruiters."
- Add new recruiters and set their permissions.
6. Finalizing and Publishing
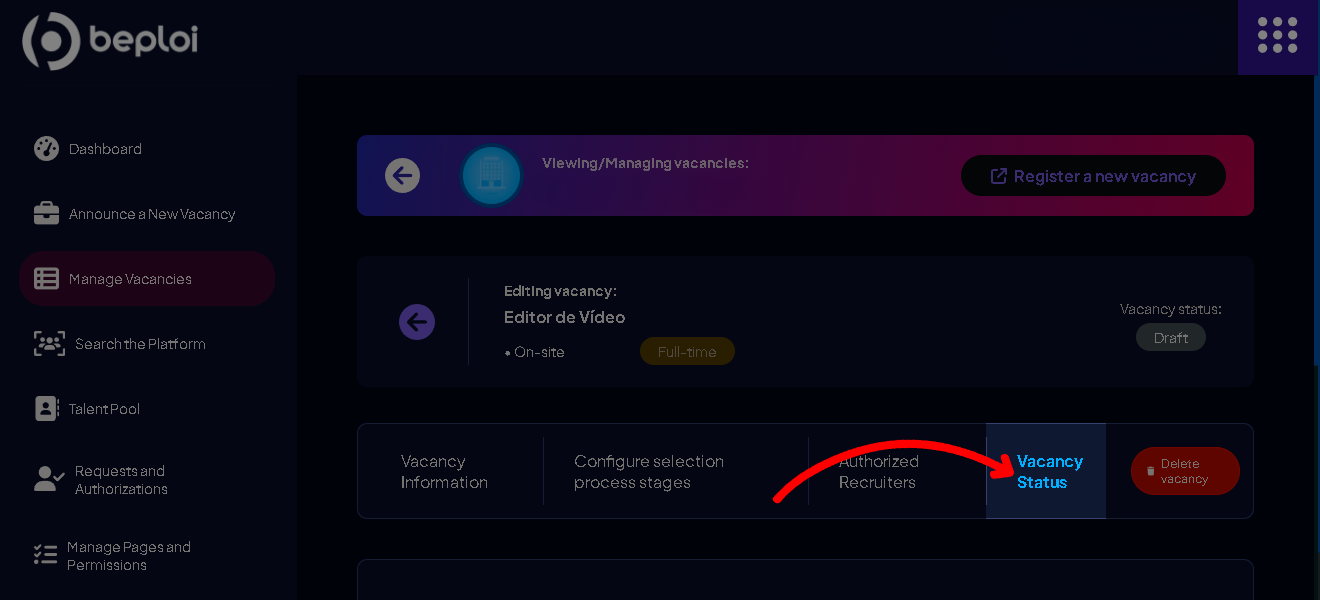
1. Click on "Vacancy Status" and change it to "Published."
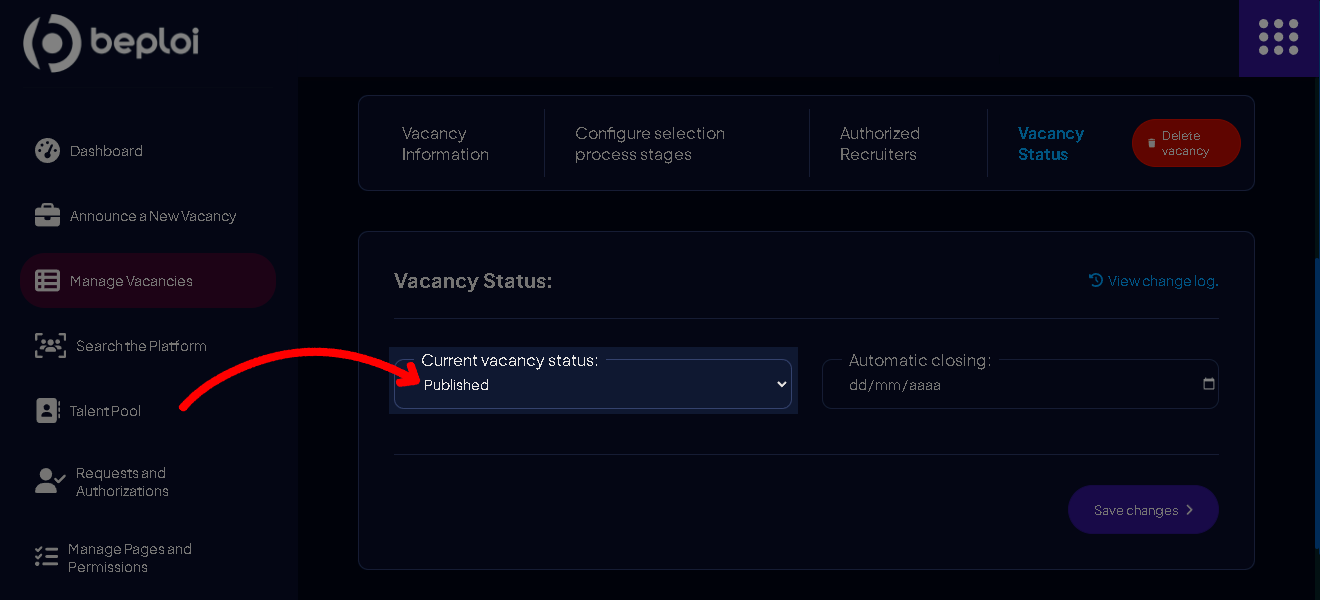
2. Set up "Automatic Closing" if desired, to define a closing date.
3. Click "Save Changes."
Done! Your job opening has been published and is now available for candidates on the platform.
